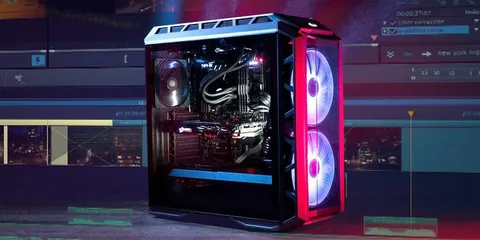
Building a PC can seem like a big, intimidating task at first—especially if you’ve never done it before. But don’t worry, you’re in the right place! At Technazo, we believe that assembling your own computer should be fun, rewarding, and an experience you’ll look back on with pride. And guess what? You don’t need to be a tech expert to get started.
So grab your tools, roll up your sleeves, and let’s dive into the exciting world of PC building.
Why Build Your Own PC?
Before we get into the nitty-gritty of how to actually put your machine together, let’s talk about why you might want to build one in the first place.
-
Customization – You get to choose every single part based on your needs. Gaming? Video editing? Basic office work? You pick the perfect components for your tasks.
-
Cost-Effective – Building your own PC often costs less than buying a pre-built one, especially if you know where to spend and where to save.
-
Learning Experience – Building a PC is a hands-on way to learn about how computers work. It’s a sense of accomplishment you won’t get from just buying something off the shelf.
-
Upgradability – When you build your own PC, upgrading it down the line is easy. Need more RAM or a better graphics card? Just swap it out!
Let’s Start With the Basics: What You’ll Need
Alright, let’s get into the parts you’ll be working with. Here’s what you’ll need to get started:
-
CPU (Central Processing Unit) – This is the brain of your computer. The better the CPU, the faster your PC will run. Popular choices include Intel and AMD processors.
-
GPU (Graphics Processing Unit) – If you plan on gaming, video editing, or doing anything graphic-intensive, a dedicated GPU is a must. Nvidia and AMD are the top contenders here.
-
Motherboard – This is where everything connects. You want a motherboard that supports your CPU, GPU, and all your other components. It’s like the nervous system of your PC.
-
RAM (Random Access Memory) – RAM is where your computer stores data that’s actively being used. More RAM means better multitasking and faster performance, especially with programs like Photoshop or games that demand more memory.
-
Storage – You’ll need a hard drive (HDD) or a solid-state drive (SSD) to store your files, games, and operating system. SSDs are faster, but HDDs offer more space for less cost.
-
Power Supply (PSU) – Your PC needs power, and the PSU is the thing that makes sure all the parts get what they need. Make sure you pick one with enough wattage to power everything!
-
Case – This is where your entire PC will live. Choose a case that fits your components and has good airflow to keep everything cool.
-
Cooling System – Your components will get hot, and that’s where cooling comes in. You can either opt for air cooling (fans) or liquid cooling (water-based systems). The better the cooling, the longer your parts last.
-
Peripherals – Don’t forget your monitor, keyboard, mouse, and speakers/headphones! These are the tools you’ll interact with your PC through, so choose ones that feel right for you.
The Step-By-Step Process
Now comes the fun part: actually building your PC! We’ll walk you through it step-by-step, and remember—if something feels tricky, it’s okay to pause, take a breath, and keep going. Here’s how to get your PC up and running:
1. Prep Your Workspace
Find a clean, spacious area with good lighting. You don’t want any tiny screws or parts getting lost. Having a small container to keep screws organized is a lifesaver. And make sure you’re grounded (a static-free environment) to avoid damaging your components.
2. Install the CPU
Start with the CPU, since it sits directly on the motherboard. Most modern motherboards have a latch to release the CPU socket. Place the CPU carefully into the socket (it only fits one way—don’t force it!) and lock it in place.
3. Add RAM
Pop the RAM sticks into the motherboard slots. Align the notches and press them firmly until you hear a click. Easy, right?
4. Attach the Motherboard to the Case
This is where things start to come together. Place the motherboard into the case and screw it into place with the provided standoffs. Make sure all the ports line up with the back of the case.
5. Install the Power Supply
Now it’s time to install the power supply. Slide it into its slot (usually at the bottom or top of the case) and screw it in. Be sure to route the cables properly for airflow and neatness.
6. Install the Storage
Whether you’ve got an SSD or an HDD, it’s time to secure it to the case. If your storage uses screws, get those in place. Then, connect the cables to the motherboard and power supply.
7. Mount the GPU
The graphics card goes into the motherboard’s PCI-E slot. Make sure it’s secured firmly into place and then screw it into the case to prevent it from moving.
8. Connect Everything
Now comes the part where you’ll need to connect all the cables—power cables, data cables, fan connectors, and front-panel connectors. It’s like plugging in all the puzzle pieces, but don’t worry, the connectors are usually designed to fit only one way.
9. Set Up Cooling
Whether you’re using air or liquid cooling, follow the instructions to install your cooling system properly. Ensure it’s positioned to blow air over the CPU and GPU for maximum effectiveness.
10. Final Check and Power On
Before turning the PC on, double-check that all the components are securely connected. Make sure all cables are routed neatly to avoid any airflow issues. Once you’re confident everything is set, plug in your power supply and hit that power button.
Installing the Operating System and Drivers
Congratulations! Your PC is built and powered up. Now, it’s time to install an operating system (like Windows, Linux, or whatever suits your needs). Most likely, you’ll need a USB drive with the OS on it. Boot from the USB and follow the prompts to get everything installed.
Once your OS is up and running, don’t forget to install all the drivers for your motherboard, GPU, and other peripherals. These drivers ensure your hardware communicates correctly with the software, so everything runs smoothly.
Enjoy Your Creation!
And just like that, you have a fully functional, custom-built PC! It might feel a bit surreal, but take a moment to appreciate the hard work you’ve put into it. Whether you’re gaming, working, or just browsing, your PC is uniquely yours, and you made it happen.
Final Tips:
-
Take your time. Rushing can lead to mistakes. It’s okay to step away for a bit if you need to!
-
Stay organized. Keep track of your screws and parts as you go.
-
Ask for help if needed. The PC-building community is huge, and there are plenty of forums, guides, and videos to help out.
And there you have it! Building your own PC is an exciting, hands-on experience that can leave you feeling accomplished and ready to take on whatever comes next. Happy building, and enjoy the journey!


Leave a comment